Homemade candy bars: Nothing is better


You can show your family and friends that you truly care about them by giving them your own homemade chocolate candy bars.
You can show your family and friends that you truly care about them by giving them your own homemade chocolate candy bars.
Just as a side note, of course, the happy recipients are certain to be impressed — stunned, actually — and grateful.
Why grateful? Because these things are truly, truly good.
Kitty Kat Bars
Yield: 18 servings
18 sugar wafers
10 ounces chocolate candy coating or tempered chocolate
Line a baking sheet with waxed paper. Melt chocolate in a microwave or double boiler, stirring frequently, until smooth. Use forks or a dipping tool to dunk each wafer in the chocolate, covering it completely and place on the prepared baking sheet. Refrigerate until set, about 15 minutes. These bars may be stored in an airtight container for 1 week.
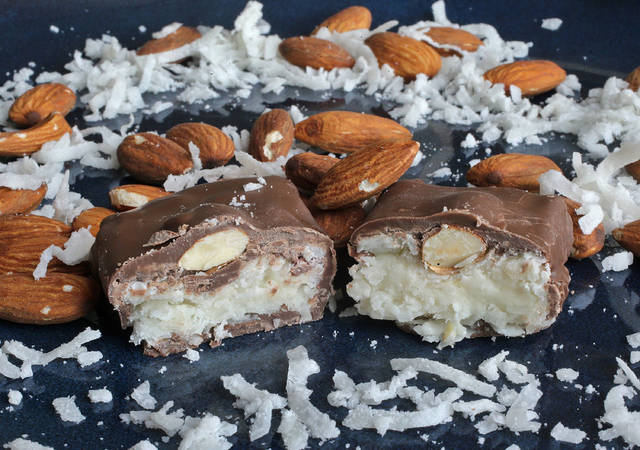
Almond Happiness Bars
Yield: About 14 servings
5 ounces (1/2 cup plus 2 tablespoons) sweetened, condensed milk
1 teaspoon vanilla extract
1/4 teaspoon salt
2 cups powdered sugar
14 ounces shredded, sweetened coconut
1/2 cup whole almonds, toasted
24 ounces chocolate candy coating or tempered chocolate
1. Line a 9-by-13-inch baking pan with aluminum foil and spray it with nonstick sprpay.
2. In a large mixing bowl, stir together the condensed milk, vanilla and salt. Gradually sift in the powdered sugar, stirring, until it is thoroughly incorporated. Add the coconut and stir until the mixture is well-combined.
3. Press this mixture into the prepared pan in an even layer. You may not use the whole pan if you prefer a thicker coconut candy. While the candy is still soft, press the whole almonds into the tops at even intervals to embed them slightly in the candy. Refrigerate until set, about 1 hour.
4. Peel away the foil and use a sharp knife to cut the candy into small rectangles.
5. Melt the chocolate candy coating in a microwave or double boiler, stirring frequently, until smooth. Using dipping tools or two forks, dunk each coconut bar completely in the chocolate, allow excess chocolate to drip off, and place on the prepared baking sheet. Refrigerate until set, 15 minutes. These bars may be stored in an airtight container for 1 week.
Peanut Butter Cups
Yield: 24 servings
24 mini cupcake papers (the size of a Reese’s Peanut Butter Cup)
8 ounces (1/2 of a 16-ounce jar) peanut butter
3/4 cup powdered sugar
24 ounces chocolate candy coating or tempered chocolate
2 tablespoons melted butter
1. Lightly coat cupcake papers with nonstick spray and set in muffin tins (you can use a baking sheet, but the bars won’t keep their shape as well). Put peanut butter in a bowl and sift in the powdered sugar; stir in the melted butter. Melt chocolate candy coating in microwave or a double boiler, stirring occasionally until smooth.
2. Spoon about half of the melted chocolate into the cupcake papers, coating the bottom and sides (you can use your impeccably clean finger to coax the chocolate up the sides). Refrigerate until set, 5 to 10 minutes.
3. Pipe or spoon about 2 teaspoons of the peanut butter mixture into the center of each chocolate cup, keeping each dollop away from the edges. Dampen your finger with water and press down on the peanut butter to flatten it a bit, keeping it away from the edges.
4. Spoon the remaining melted chocolate over each cup to cover the peanut butter. Refrigerate for 30 minutes until set. These candy bars can be kept in an airtight container for a week.
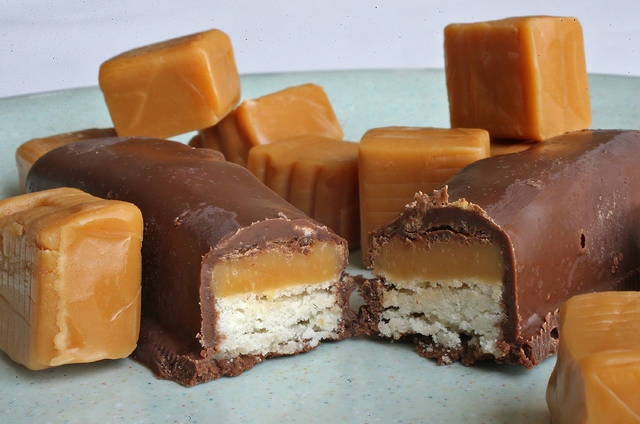
Twicks Bars
Yield: 20 servings
11 tablespoons (1 stick plus 3 tablespoons) butter, softened
1/2 cup granulated sugar
2 cups cake flour or 13/4 cups all-purpose flour
1/2 teaspoon salt
22 ounces soft caramels, unwrapped
2 to 3 tablespoons heavy cream
16 ounces chocolate candy coating or tempered chocolate
1. Preheat oven to 350 degrees. Line a 13-by-9-inch baking pan with aluminum foil and spray with nonstick spray.
2. Beat butter and sugar together with a mixer on medium speed until light and fluffy, about 3 minutes. And flour and salt and mix on low speed just until flour is incorporated. Scrape dough into the prepared pan and use your impeccably clean hands to press it into a thin, even layer. Bake until lightly golden brown, about 18 to 20 minutes, turning pan halfway through. Do not overcook. Allow to cool completely.
3. Combine caramels and cream in a microwave-safe bowl, using 2 tablespoons of cream if the caramels are soft and 3 tablespoons if they are stiff. Microwave until melted and smooth, stirring after every 30 seconds. Pour the melted caramel over the shortbread cookie crust and smooth into an even layer. Refrigerate to set the caramel completely, about 1 hour.
4. Melt the chocolate candy coating in a microwave or double boiler, stirring frequently, until smooth.
5. Remove the caramel-covered crust from the pan, using the foil as handles, and then peel off the foil. Use a large, sharp knife to cut about 10 finger-width strips along the long edge, then cut in half for a total of 20 bars.
6. Use dipping tools or forks to dip the bars in melted chocolate, covering them completely, and place on a tray lined with foil or waxed paper. Refrigerate until set, about 10 minutes. These bars may be kept for 1 week at room temperature in an airtight container.


